


How to Install Windows 11 on macOS Big Sur using Boot Camp
Background
We have this legacy Apple MacBook Pro (Retina, 15-inch, Late 2013 model), an Intel processor 2.3 GHz Quad-Core Intel Core i7.
Previously, this device was in production running Boot Camp for Windows 8.1, and this machine was never attempted to upgrade to Windows 10 or 11.
Solution
Requirement
- Apple MacBook Pro Intel Chip
- USB thumb drive 32 GB
- 2nd USB thumb drive 64 GB
- Microsoft Windows 11 license key (optional)
Removing Boot Camp Partition and Updating macOS
As the machine was no longer in production and the proportion of the partition disk was no longer relevant, we wiped the Boot Camp partition via Boot Camp Assistant on the macOS side.
Note: Initially, we attempted to readjust the partition from the Microsoft Windows side and cause headache and eventually we did wipe and reinstall the macOS instead from the recovery disk (macOS Maverick - version 10.9). This process was pretty messy and we recommened to do it from the macOS side and run the Boot Camp Assistant instead.
On the macOS, we ensure to upgrade to macOS Sierra first.
Note: We need to get to this macOS version first as the next macOS version required a Multi Factor Authentican (MFA) when you access to Apple Store.
Once upgraded, we then do the necessary updates for this version.
Next, we upgrade to macOS Catalina and ran the updates.
Note: We could technically upgrade straight to macOS Big Sur but we did not realise that the Big Sur can be installed on this MacBook Pro.
Then, we upgrade to macOS Big Sur and run the updates.
Installing Windows 10
Run the Boot Camp Assistant.
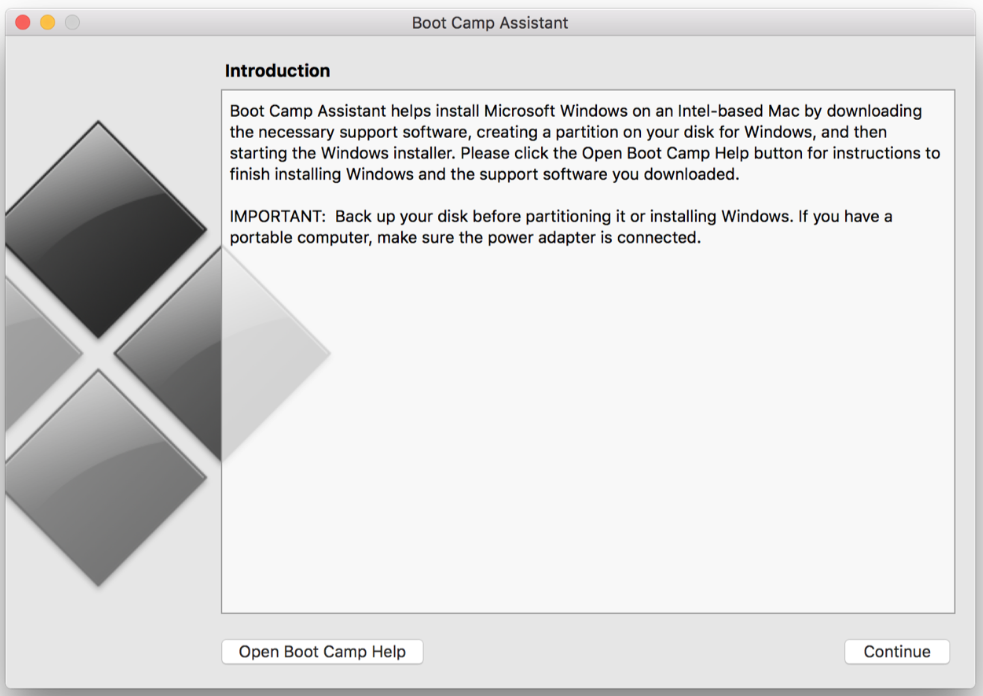
We need to run this Boot Camp process into two phases.
We run the Boot Camp Assistant for the Apple Windows part only and then just download the Apple Windows component into the first USB thumb drive.
Once it is completed, we rerun it, and this time selects the whole options – Create a Windows 10 or later version install disk, Download the latest Windows support software from Apple, and Install it remove Windows 10 or later version.
For the partition, we select 51% for MacOS and 49% for Windows.
We run the regular Windows 10 installation process, i.e. language, keyboard, account etc.
Windows 10 loads and runs.
The Apple Windows Support automatically run, and this process will install the necessary drivers.
We then reboot the device into Windows 10.
Next, we run the Apple Software Update application and install the additional updates.
We then reboot the machine into Windows 10.
Run the Windows 10 Update as well as Driver optional.
We then reboot the machine into Windows 10.
Upgrading to Windows 11
Prepare for Windows 11 by downloading MediaCreation Tool from AveYo’s Github.
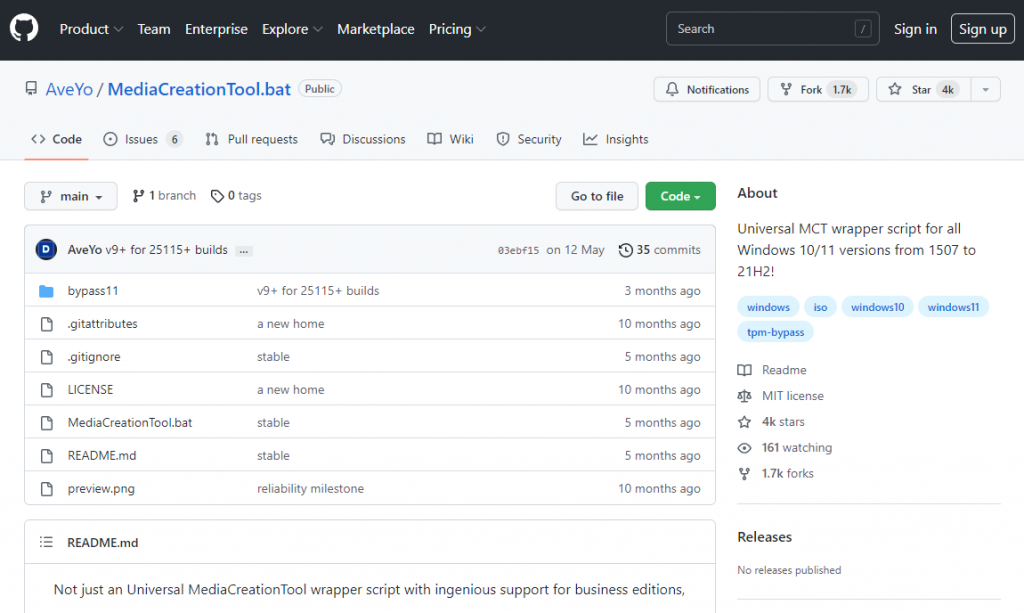
Select the Code and download the zip file.
Extract the zip files.
Run the MediaCreationTool.bat file as Administrator.
Select the 11 as an option.
We then select the Auto USB option instead. Ensure to put the 2nd USB disk first.
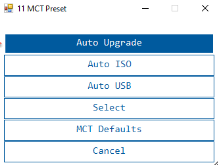
Note: We attempted to use the Auto Upgrade option, BUT it did no initiate the upgrade succesfully for some reason. That the reason we use the Auto option USB instead.
Completed this Auto USB process.
Keep the 2nd USB inserted.
Reboot the machine and keep pressing the Option button to have the option for boots such as Macintosh HD, EFI boot, and Windows.
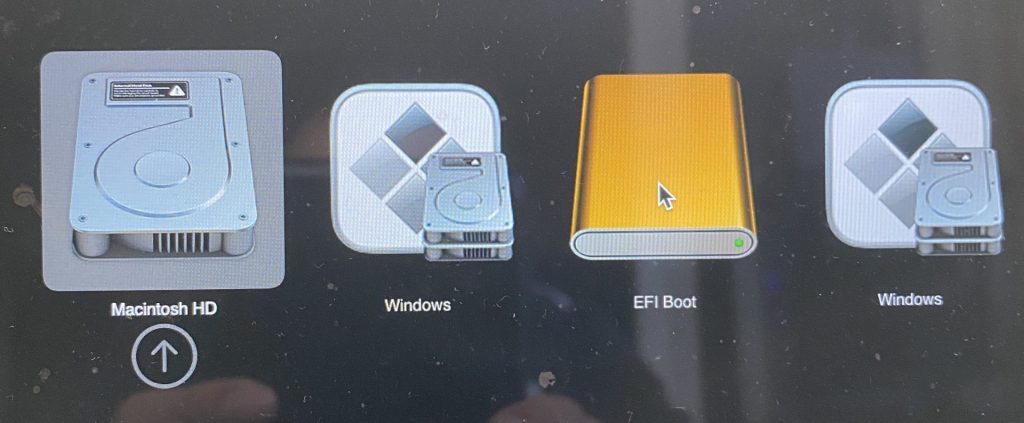
Select the EFI Boot option and will start the Windows 11 installation.
Once Windows 11 is loaded, insert the first USB disk where the Apple Windows Support.
Open up the BootCamp folder in Windows Explorer and run the Setup.exe file.
This will run a similar process as when we installed Windows 10 previously. This runs the Apple Windows Support and installs the necessary drivers.
Then reboot the machine into Windows 11.
We run the Apple Software Update application and install the additional updates.
Reboot the machine into Windows 11.
We run the Windows 11 Update as well as Driver optional.
Reboot the machine into Windows 11.
It is done, and we have Windows 11 properly up and running!
The End
Congratulation on reaching the end of this article. We hope we have shed some light on outlining how to install Windows 11 on macOS Big Sur using Boot Camp.
We write this so that this is not a fixed article. Like in this journey, we learn as we go and re-write some parts, so please keep pinging with this article.
We also would love to hear about how you deal with the situation and what problems you might be facing. Please feel free to comment below this article or jump into our Dewachat and let us know if you have any questions we can answer!
To boost your product and service to the broader web community, you can visit our Dewalist classified website – home to 33,000+ active users and 40,000+ one year of active advertising so far. Check it out!
If you love this article or any tech posts and you would like to receive an update of this article or our latest post, please sign up for the form below: