


How to Install the Kali Linux on Windows 11 via Hyper-V

Environment
These are the current environment:
- Custom PC machine with AMD Chip and Gigabyte motherboard.
- Microsoft Windows 11.
Kali Linux
Open up a browser and go to https://kali.org

On the top navigation, click the Get Kali option.
Select the Bare Metal option below.

Ensure to the iso download the 64-bit Installer option.
Hardware Virtualisation
Need to check whether the hardware virtualisation is enabled or not.
As we are using an AMD machine with a Gigabyte motherboard, we need to enable that first.
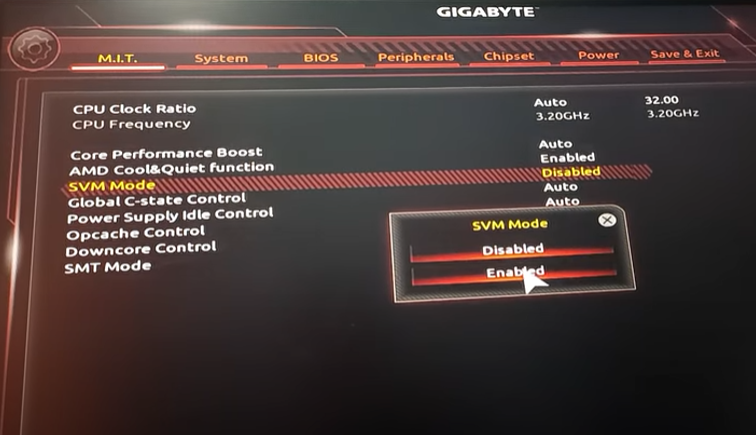
To enable, go to BIOS by pressing Del continuously until seeing the main screen.
Navigate to the M.I.T tab.
Go to Advanced CPU Core Settings and then select the SVM Mode. Then enabled it.
Data Execution Prevention (DEP)
Data Execution Prevention (DEP) is built into Windows 11 and this adds an extra layer of security that stops malware from running in memory. It is enabled by default and is designed to recognise and terminate unauthorised scripts from running in reserved areas of computer memory.
To turn on DEP, run this command:
bcdedit.exe /set {current} nx AlwaysOn
To turn off DEP, run this command:
bcdedit.exe /set {current} nx AlwaysOffHyper-V
On Windows 11, click the Search and type in “Turn Windows features on or off“.
Select that option and the Windows Features window appeared.
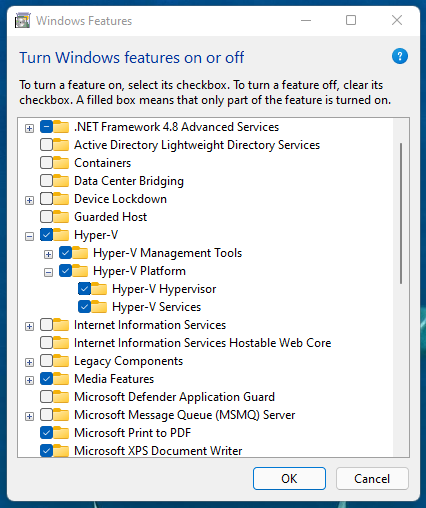
Select all Hyper-V and click the OK button.
Click the Search and type in “Hyper-V Manager“.
This will launch the Hyper-V Manager window.
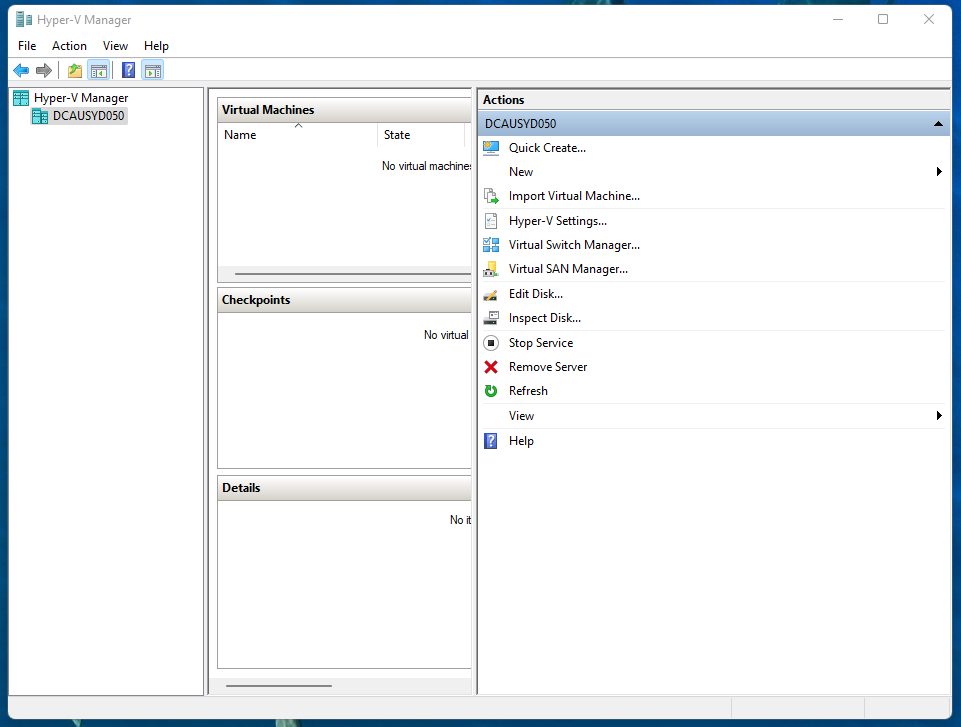
Click the New button.
Select the Virtual Machine.
Under the Specify Name and Location, give the name of the virtual machine. Leave the default location. Click the Next button.
Under the Specify Generation, select the Generation 1 and click the Next button.
Under the Assign Memory, enter 2,048 MB for start. Uncheck the Dynamic Memory option. Click the Next button.
Under the Configure Networking, select the Default Switch. Click the Next button.
Under the Connect Virtual Hard Disk, change the size to 64 GB. Click the Next button.
Under the Installation Options, select the Install an operating system from a bootable CD/DVD-ROM. Select the Image file (.iso) option and point to where you download the Linux Kali iso above. Click on the Next button.
Revied the summary. Click on Finish.
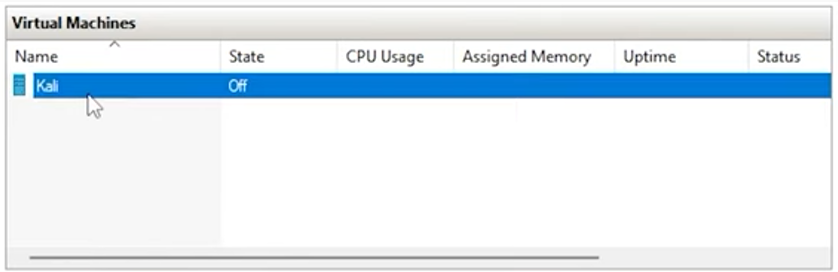
Back to Hyper-V Manager.
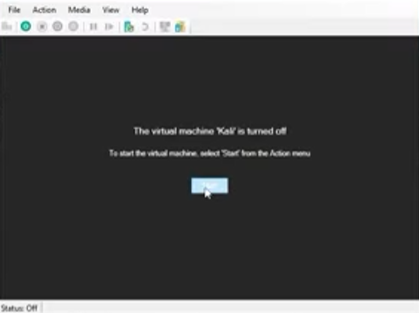
Right-click on the machine, and select Connect.
The window pup-up for the virtual machine. Click the Start button.
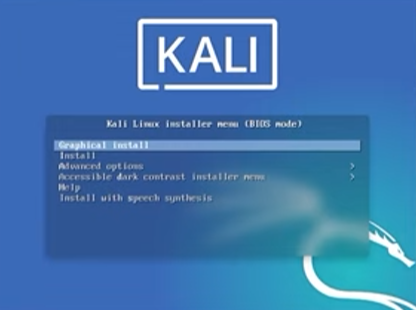
The Kali start. Select the Graphical Install option.
Choose the location. Click the Continue button.
Choose the keyboard location. Click the Continue button.
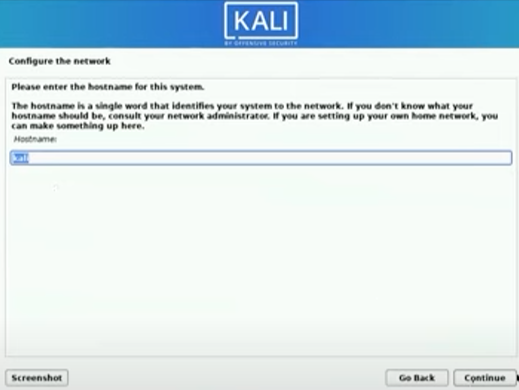
Leave the default hostname – kali. Click the Continue button.
For the domain name, leave the empty as default. Click the Continue button.
Under the setup users and password, give the real name, username and password. Click the Continue button.
Select the time zone accordingly. Click the Continue button.
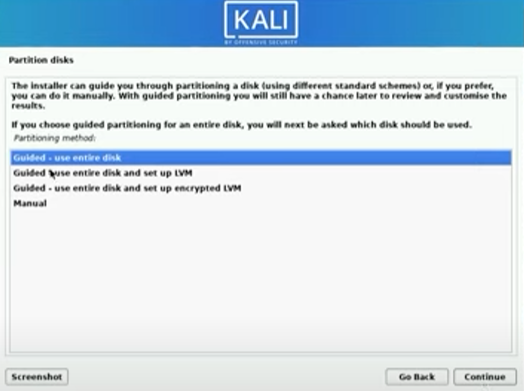
Select the Guided – use entire disk option. Click the Continue button.
Reviewed the partition disk. Click the Continue button.
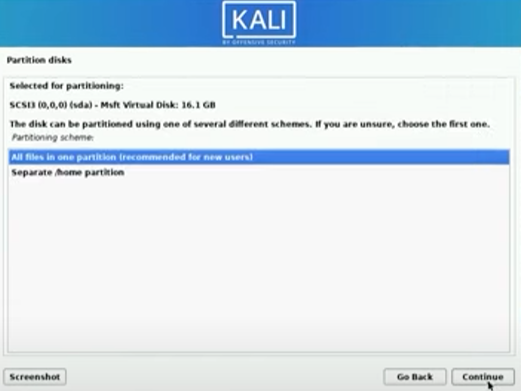
Select the All files in one partition option. Click the Continue button.
Select the Finish partitioning and write changes to the disk option. Click the Continue button.
Select the Yes option for the Write the changes to disks option. Click the Continue button.
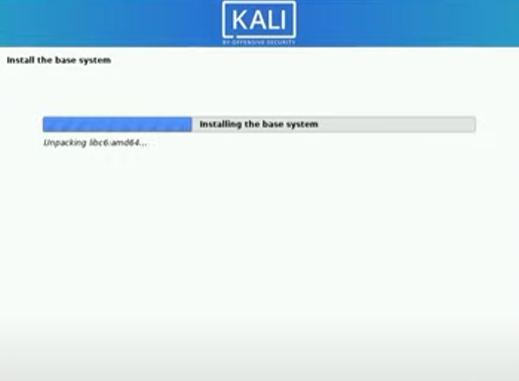
This will start to install the base system.
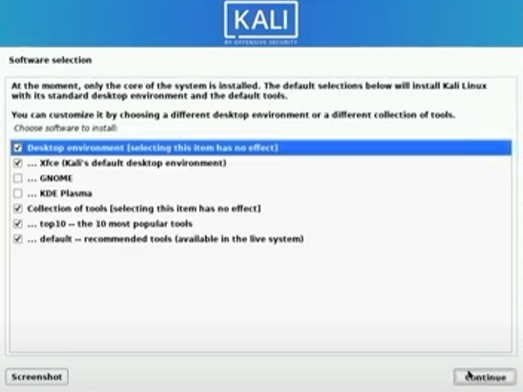
Under the Software Selection, leave the default as it is. Click the Continue button.
Click the Yes option for the Install the GRUB boot loader to your primary drive. Click the Continue button.
On the next page, ensure to select the right device. Click the Continue button.
OK, now the installation is complete. Click the Continue button.
This will reboot the virtual machine.
Enter the username and password that was created before.

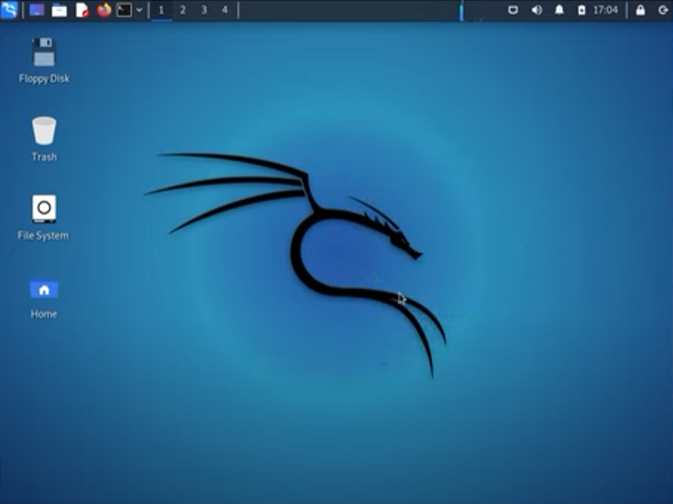
The desktop loaded.
Test the connection by opening the Mozilla Firefox on the top of the taskbar.
For the latest version of Kali, the root login is disabled, forcing you to log in to the GUI with your normal user account.
Open terminal.
Run the command:
sudo apt update
sudo apt install kali-root-login
Run another command:
sudo passwdEnter the password twice.
That’s it! Now, you can switch users as root to login.
The End
If you have reached the end of this article, congratulation. Hopefully, we have been able to shed some light on outlining what you need to know to install the Kali Linux on Windows 11 via Hyper-V.
We write this in such a way that this is not a fixed article. Like in this journey, we learn as we go and we re-write some parts of the article so please keep pinging with this article or any tech posts.
If you have a question or anything, please drop us a comment below or you can chat with us on Dewachat.
If you like our content and would like to say thank you, you can support us by buying me a coffee.
We also would love to hear about how you deal with the situation and what IT-related challenges you might be facing. You can contact us on the Dewacorp website for your IT support, application integration, application development, or other IT-related. Let us know if you have any questions that we can help with. Thanks again!
If you want to boost your product and service to the wider web community, you can visit our Dewalist classified website – home to 25,000+ active users and 10,000+ active advertising so far. Check it out!
If you love this article or any tech posts and you would like to receive an update of this article or our latest post, please sign up for the form below: