How to Fix a Solid State Drive (SSD) Read-Only

The Challenge
We had a Samsung Solid State Drive (SSD) disk that has bad sectors scattered across the disk. We found these bad sectors through the application called Samsung Magician.
We bought this disk about a year ago and we contacted the vendor and they said the disk has 5 years warranty. Technically, we can return this faulty disk and get a new one from the vendor that we bought from.
Due to we have data that needs to get it back (just in case), we have to clone the disk using a tool called Ease Partition Master. Prior to doing the disk clone, we bought a Samsung SSD SATA 3 similar size and we did the clone successfully.
Next before returning, we need to wipe the data. However, when we try to fix the disk and reformat the data, we are not able to do that due to Read Only!!!
A read-only mode is when you can only view, copy, or read files from the SSD but can’t modify or write to any of them.
What We Have
Samsung EVO 970 M.2 1 TB
Why SSD Write Protected
Write protection is a feature that is activated on external devices such as hard disks, SSDs, and USB drives to keep data safe. People sometimes go this route when they want to stop their data from getting deleted, reformatted, or moved accidentally.
The symptoms:
- In Disk Management on Windows, the SSD is marked as a read-only mode
- Can not open the SSD and Windows shows “The disk is write-protected. Remove the write-protection or another disk”.
What causing these:
- You may add the write protection yourself
- The bad sector can cause this
- Third-party software can add a write protection
The Solution
We researched this issue and found some methods. We then tested each method and we found some did not work and some worked. Then we documented this.
Method 1 – Remove SSD Read only via Diskpart command
Note: In our case, this method didn't work. We rebooted the machine and found the disk still marked as readonly.
Diskpart is a utility that we can use to manage partitions and format disks. You should be careful though or you might mess something up and get rid of all the data currently stored on that drive.
To do this:
Press the Windows key and search for Command Prompt
In the command prompt, type in “diskpart”:
diskpartThen, type in the list disk:
list diskType “select disk #“.
select disk #Note: # is the number of SSD drive. Please ensure to select the right disk.
Type “attributes disk clear readonly“:
attributes disk clear readonlyQuit from the diskpart utility.
A tool like Disk Management is often useful for troubleshooting issues. Check again.
Method 2 – Run CHKDSK to fix bad sector
Note: In our case, this method didn't work either. We rebooted the machine and found the disk still marked as readonly.
Sometimes, bad sectors on the drive can cause Windows to show that you are using a read-only SSD. For example, if this is happening on your PC, CHDSK might be able to repair it. This program is built into most versions of Windows and automatically searches for any kind of irregularities in the disk and fixes them.
To do this:
Press the Windows key and search for Command Prompt
In the command prompt, type in “chkdsk #: /f /r /x” where # is your SSD
chkdsk #: /f /r /xExit from the command prompt.
On Windows, check again the disk status via Disk Management.
Method 3 – Format via AOMEI Partition Assistant Standard
Note: In our case, this method work partially. Due to the disk format, we are not be able to see the content of the disk any longer which is a good thing, but then not be able to reuse the disk.
Our goal is to wipe the disk before returning the disk the vendor for replacement. So have a backup already through a clone disk. We do not care about reusing the disk :)
After testing all the methods above and still facing Read Only issue, we tried to format the drive from Disk Management or File Explorer and still failed. In Disk Management, the Format option is greyed out. In the File Explorer, an error shows “The disk is write protected”.
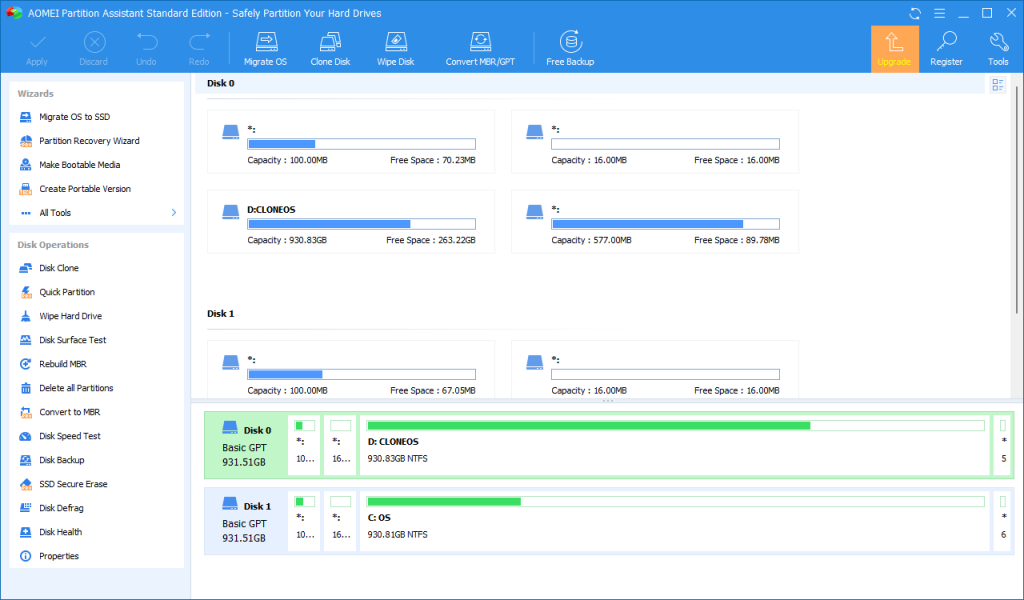
We found this tool called AOMEI Partition Assistant Standard.

Follow this step below:
Download AOMEI Partition Assistant Standard on your PC.
Install the software.
Open up the software and find the SSD that you need to fix.
Right-click on the drive and select “Format Partition”.
In the pop-up window, you can choose a compatible file system. For Windows, select NTFS and hit OK.
In the main, click Apply and then Proceed to start the operation.
Close the app.
Check again the disk status via Disk Management on Windows.
The End
Congratulation on reaching the end of this article. We hope we have shed some light on outlining how to fix SSD read-only.
We write this so that this is not a fixed article. Like in this journey, we learn as we go and re-write some parts, so please keep pinging with this article.
We also would love to hear about how you deal with the situation and what problems you might be facing. Please feel free to comment below this article or jump into our Dewachat and let us know if you have any questions we can answer!
To boost your product and service to the broader web community, you can visit our Dewalist classified website – home to 33,000+ active users and 40,000+ one year of active advertising so far. Check it out!
If you love this article or any tech posts and you would like to receive an update of this article or our latest post, please sign up for the form below:


